


DIY Scope Mounting
When it comes to optics today the sky is truly the limit. It doesn’t matter if you have a modest budget or a large one, there is an optic out there that will suit your needs. The one thing all optics have in common is their need to be mounted on your rifle properly in order for you to be effective in the field. Taking the time to learn how to properly mount your own scope will not only save you from mistakes in the field, but also from a long list of headaches that are associated with a poorly mounted optic or loose mounting system.
The only way to eliminate the laundry list of issues is to properly mount the optic yourself.
I realize that the thought of mounting your own optic can cause the less mechanically inclined to reach for a brown paper bag to stop the hyperventilating, but it truly is not that hard. Remember, trusting the nice guy at the counter of your local sporting goods store to do it for you is risky at best, and the tools cost less than you’d expect.
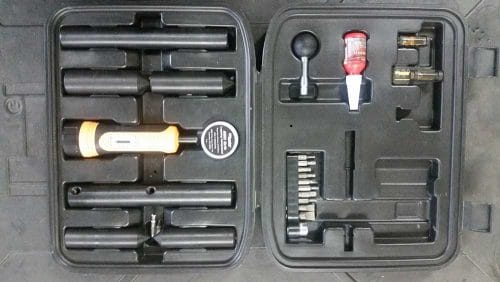
One of the most common and readily available tool sets is the Wheeler Engineering Scope mounting kit. It retails for less than one hundred dollars and has everything you will need to properly mount your optic. This includes a torque wrench, action level, optic level, Loctite, a variety of commonly used driver bits, and a set of lapping bars for both 1 inch and 30 mm scope rings.
The first step in mounting your optic is to check that the firearm is unloaded and safe. When you clear the rifle we recommend that you remove the bolt. Not only does that ensure safety, but it needs to be removed during the process anyway. When mounting an optic it is imperative that you start at the rifle and work your way out. By doing so you can address any loose screws or issues with the mounting surface before it becomes a problem. As you check the bases of your rifle make sure that they are torqued to manufacturer specifications, which can vary but is usually between 25 and 35 inch pounds.
If you find movement in any of the base screws now is the time to address the issue. Simply pull the screw, clean it with rubbing alcohol (this removes any unwanted grease or oil), and apply blue Loctite to the screw before torqueing it down. Why blue Loctite? Well, if you ever choose to remove the current bases and swap them for another mounting system you should still be able to remove the screws somewhat easily and without breaking one (don’t ask how I know)! Once you have ensured that the base screws are torqued properly and there are no issues you can move forward.
The next step in mounting your scope is attaching the rings to your base. This is fairly simple and straightforward although the process can vary depending on the type of screws and bases you have chosen. For this article we are mounting the rings to a common picatinny rail. In order to attach the rings to your base you will need to align the stud on the bottom of the ring with the appropriate slot on the rails and firmly set it in place at 406. We like to put a slight forward pressure on the lower part of the ring during this process (this assures that both rings are in the same location in the mounting slots).
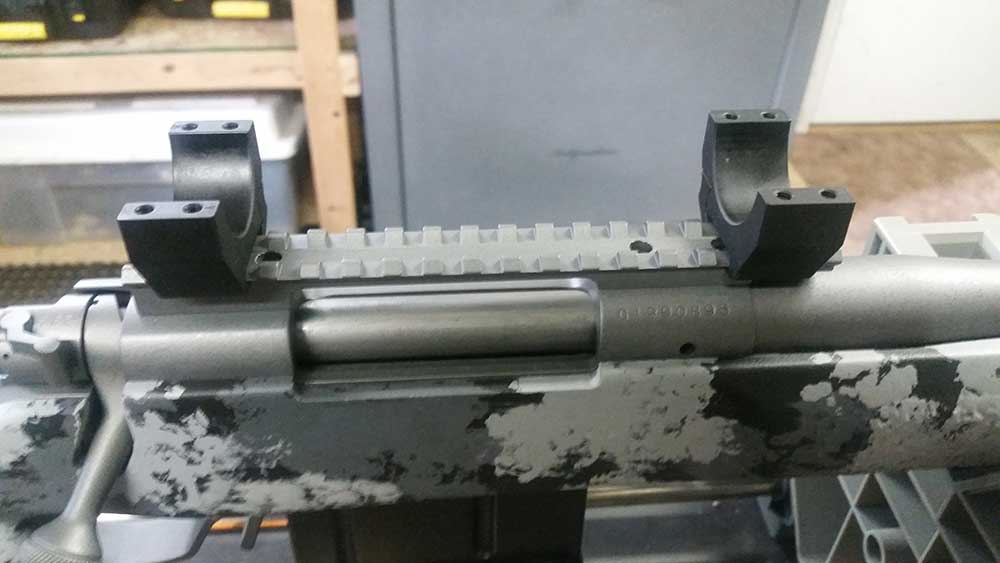
Once the lower halves of your rings are in place take the time to set your scope in them and make sure the spacing is adequate for your optic. We recommend setting the rings as far apart as possible, but be careful to avoid the bell of the scope and the power adjustment ring as you can damage the scope if you crush the bell or are too close to the power ring.
After you have set your spacing you can torque your rings down to the bases (once again check the manufacture specs for your rings and stay within their guidelines). As soon as you have installed the lower half of your rings on your base you may begin the process of actually mounting the optic to your rifle. You need to pay extra close attention to detail during these steps in order to avoid mounting issues or worse, damaging your scope.
With your scope placed in the lower half of the rings you can install the upper halves and tighten them down just enough to gently hold the optic, but still allow enough movement so you can rotate the scope inside the rings with ease.
“It is important to mention there are several ways to level your scope. Some are as simple as a deck of cards and some are a lot more involved and expensive. We have used the wheeler kit in this article because it is affordable, reliable, and includes a torque wrench, which is an absolute must to properly mount an optic. There are also a ton of different opinions on whether you should level the optic to your action or to your body.
Now, I will agree there is merit to both arguments and that at normal hunting distances either technique will suffice. We recommend leveling your scope with your action simply because a good gunsmith will time a barrel when installing it on an action. This process, if done properly, ensures that the deflection in the barrel (yes even rifle barrels show deflection) points at the 12 o’clock position. For this reason we level our scope to the action as it allows us to get the most adjustment out of our scope and eliminates running out of windage adjustment in your optic.”
Inside the kit you will find an action level and an optic level. You will need to install the action level onto the feed rails, taking extra care to make sure that it is sitting on both rails and not canted or tipped to the side. The use of a rifle vise is very helpful during this operation, however if you do not own a vice a bipod can be used to hold the rifle level during this operation.
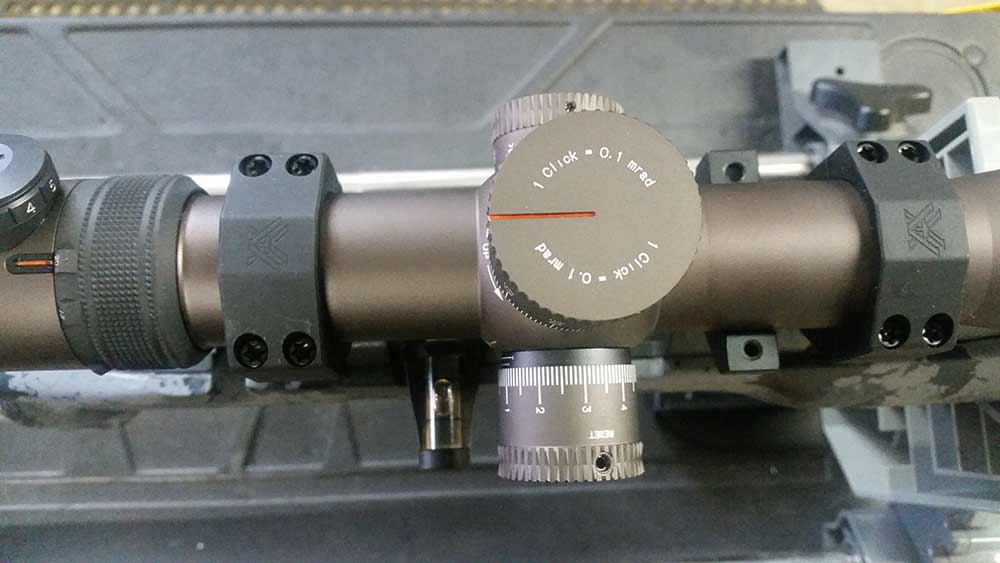
Once your action is level it is now time to set the optic level on the elevation turret of the scope (if the elevation cap does not have a good flat spot for your level you can remove the cap and use the turret itself as a platform for the level). At this point you will need to carefully rotate the scope in the rings until it is level with the action. When both the scope and action are level you can begin the process of tightening down your upper rings and securing the scope.
During this process, once again pay special attention to the scope manufacturer torque specs and stay within these guidelines. I like to set the torque at about half the recommended spec and tighten the scope down. When tightening the scope you will find that it works best to apply a little tension at a time and alternate from left to right and front to back as you tighten the screws. Once you have reached ½ the recommended torque setting, and are satisfied with the optic and levels, you can repeat the process again at full value specs.
If you choose to use a scope level now is the perfect time to install it while the rifle is held in a level position and you know your scope is level. The use of a scope level is a debated topic, but we recommend using one. In all shooting, consistency is king and the use of a level allows the shooter to ensure they are taking the shot with their reticle level regardless of the terrain or position that the shooter may find themselves in. This adds consistency to their shooting and in turn makes it more repeatable.
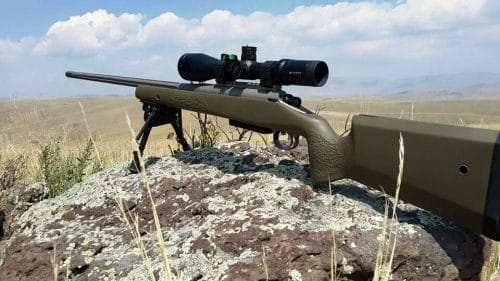
Now that your scope is properly mounted, get out in the field and practice in the same conditions that you find yourself in while hunting! Remember, it’s not how far you can shoot, its how well you can shoot that matters!!!!


When you finish mounting your scope, and your action won’t close… the screws on your bases are probably too long.