


I’ve always been a little timid when it comes to processing my own meat. The thought of picking up a couple of boxes of professionally butchered and wrapped meat has always been appealing to me, so learning to do it myself has been a slow process. However, the satisfaction I’ve derived from carefully curating the transformation from field to plate has led me to dive ever deeper into the process, and in so doing I’ve gained a new and deeper appreciation for each step along the way.
With the rise of social media, many of us have likely seen the presentation of a beautiful tomahawk steak. In beef it’s known as a bone-in-ribeye or “cowboy steak”, in deer it’s often called a “tomahawk steak” or “whitetail lollipop”. Whatever you want to call it, I’ve been fascinated with trying them for myself ever since I first saw them cropping up on my Instagram feed. Hesitant to mess things up, the first time I flopped a tomahawk steak on my grill it came from my favorite local butcher. The reception of that first one was so overwhelmingly positive that it actually affected my visual perception of the world! From that moment on every deer that I saw was simply a rack of tomahawk steaks with legs! I was instantly obsessed and immediately began learning the steps to extract them on my own.
The Process
The following is a short photo presentation of the process that I use to turn a dead deer into a succulent and classy feast that may very well change your life forever!
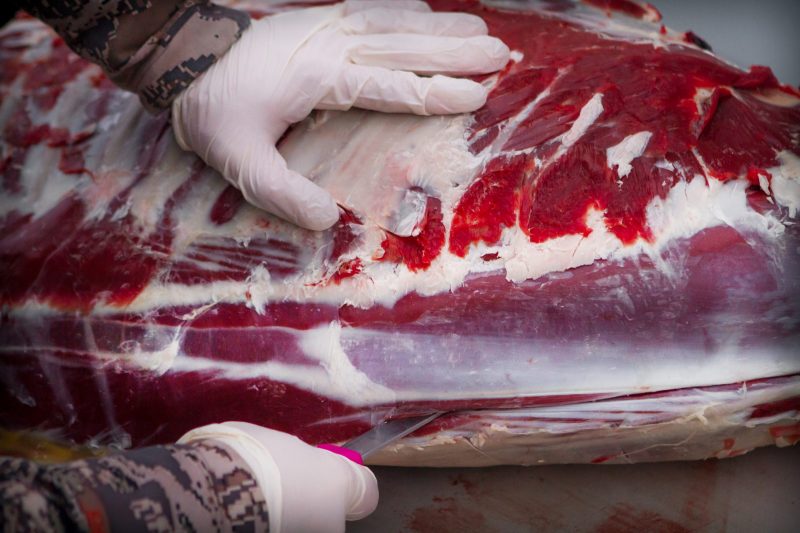
The first thing to know is that a tomahawk steak is very simply a cross-section of the “backstrap” or loin of the deer, with a portion of the rib bone still attached. As with any meat processing, what is done to the carcass immediately after the kill is vitally important. Carefully field dress and skin the deer as soon as possible to reduce unwanted flavors. There are varying opinions on hanging and aging the meat, so I won’t be the final judge on what you decided to do regarding that, I’ll simply say that you want the carcass dry and clean and the silver-skin removed.
Step 1
The first decision will be how much rib bone we want to leave on the steak. If you “French” or clean the entire bone, that would be considered the classic presentation. If you only leave an inch or two that would sometimes be called a “caveman steak” or bone-in-rib-steak. I like to leave about 5-6” which still gives it a nice presentation and seems about proportionate to the size of the venison steak. So simply decided how much rib you want to keep and saw them at that length with a fine-toothed meat saw.
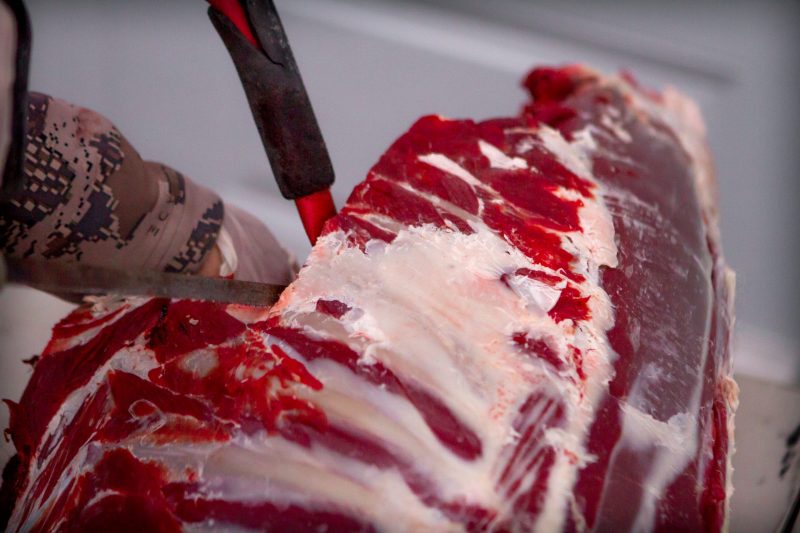
Step 2
The next cut will be right along the vertebrae line the entire depth of the backstrap. Be careful not to leave any meat against the backbone, and don’t follow down around the rib like you would when taking out the backstrap. Just cut straight down beside the vertebrae until you feel the top of the rib bones and slice the length of the backstrap.
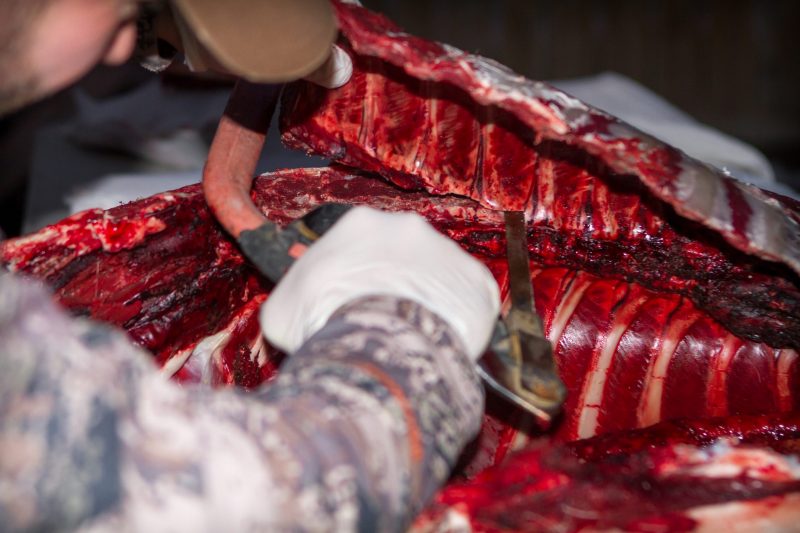
Step 3
Next use your meat saw to begin cutting the top of the ribs at the point where they join the spine. The easiest way to achieve this is to cut from the inside of the body cavity. As you saw, use your other hand to pull the rack of ribs away from the spine. This is a bit tricky to get started, but once you’re in a rib or two it becomes easier and easier.
Step 4
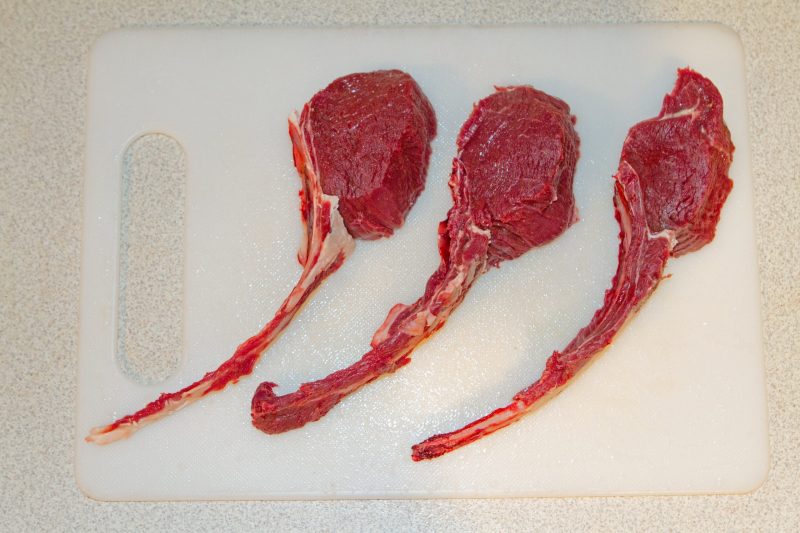
Now you should have a full rack of ribs with the backstrap attached. As you can notice the amount of meat on the one end is quite a bit less than the other end. For that reason, some guys will only take the first 4 or 5 tomahawks and use the others as a standing-rib-roast.
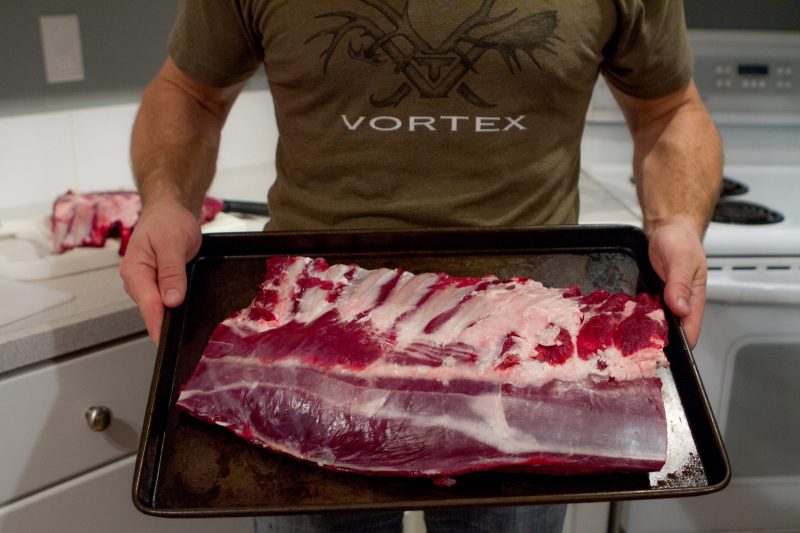
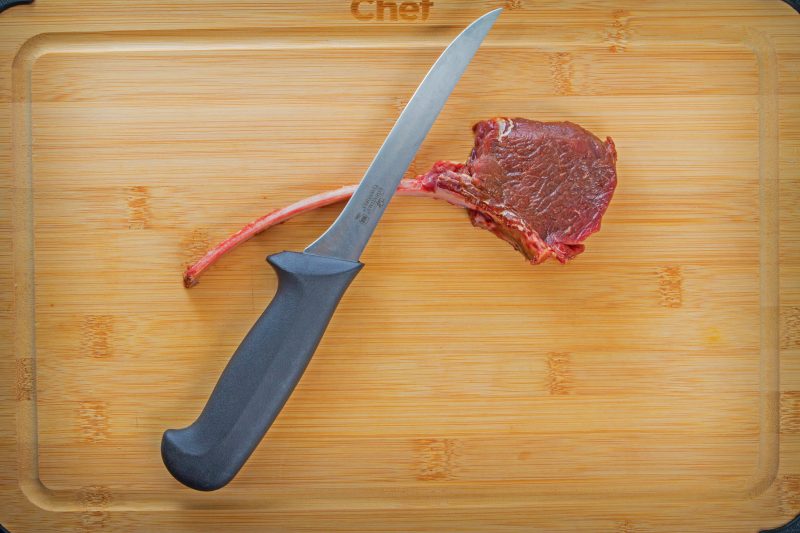
Once you’ve got the rack on your cutting board, carefully make clean cuts between each rib to separate the individual steaks. A beef tomahawk is roughly 2” thick, a venison tomahawk is usually about 1” thick. For smaller deer, you may want to keep two ribs on one steak in order to achieve sufficient thickness. Ensure the silver skin and any unwanted fat is removed, wrap them individually in butcher paper and you’re done.
Step 5
Now that you’ve got your steaks cut and wrapped, it’s time to make your marinade. Of course, a simple salt-&-pepper rub or your favorite steak seasoning will work just fine, but for something a little different I like to use a teriyaki bbq marinade that my wife has developed from various recipes. Let the thawed meat soak in the marinade for 2-24 hours.
Step 6
You can grill these just like you do your favorite steaks, I cook mine over charcoal at high heat. Once the coals are over 500 degrees F, I carefully set each steak on the grill. Depending on the depth of the coals the steaks should take between 3-8 minutes per side. Remember, these steaks are thin and don’t have nearly as much fat as their beef counterparts so avoid overcooking! An accurate meat thermometer is the best way to achieve perfectly cooked steaks. I like mine to be medium to medium-rare, so I take the meat off once the middle temperature hits 125-130 degrees. Immediately move to a warm plate, cover with foil or a lid and allow the steak to sit undisturbed for at least 5 minutes. I will occasionally set my stove to low and rest the steaks in there if I need more time before plating. As the steak rests the internal temperature will rise by about another 10 degrees and the savory juices will settle throughout the meat resulting in a mouth-wateringly tender and juicy steak.
You can also pan-fry the steaks on a cast-iron skillet. Heat the skillet on high and get 1-2 Tbsp of vegetable oil piping hot but not quite smoking. Then place your dry steaks on the skillet and listen to the sizzle. If you want to get fancy, throw in a thick slice of butter and some crushed garlic in the last two minutes for an even richer, juicier finish. Once again, set the steak aside to let them rest for at least 5 minutes. Once you’re done, the hardest part of the whole process will be waiting for the steaks to rest before you can eat!
Step 7
Bon-Appetit!
Teriyaki BBQ Marinade Recipe
– 1 tsp Garlic Powder
– 1 tsp Ginger
– ½ cup Soy Sauce
– ½ cup Ketchup
– ½ cup Sugar